Tkinter
What is Tkinter
Tkinter is the de facto way in Python to create Graphical User interfaces (GUIs) and is included in all standard Python Distributions. In fact, it’s the only framework built into the Python standard library.
Python has a lot of GUI frameworks, but Tkinter is the only framework that’s built into the Python standard library. Tkinter has several strengths.
It’s cross-platform, so the same code works on Windows, macOS, and Linux. Visual elements are rendered using native operating system elements, so applications built with Tkinter look like they belong on the platform where they’re run.
Building Your First Python GUI Application With Tkinter
The foundational element of a Tkinter GUI is the window. Windows are the containers in which all other GUI elements live. These other GUI elements, such as text boxes, labels, and buttons, are known as widgets. Widgets are contained inside of windows.
First, create a window that contains a single widget. Start up a new Python shell session and follow along!
With your Python shell open, the first thing you need to do is import the Python GUI Tkinter module:
Code:
>>> import tkinter as tkA window is an instance of Tkinter’s Tk class. Go ahead and create a new window and assign it to the variable window:
Code:
>>> window = tk.Tk()When you execute the above code, a new window pops up on your screen. How it looks depends on your operating system:
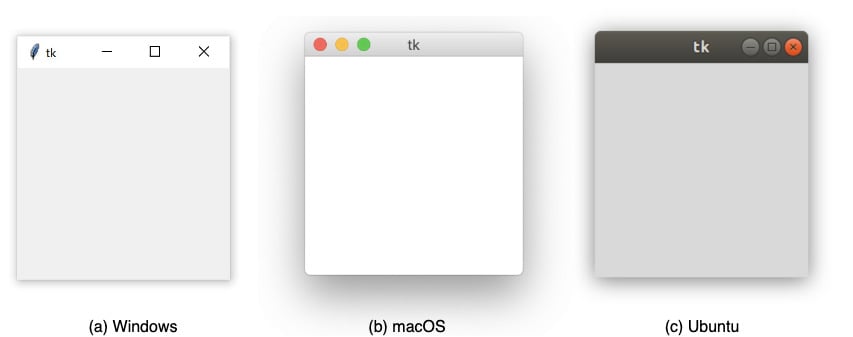
Throughout the rest of this article, you’ll see Windows screenshots.
Adding a Widget
Now that you have a window, you can add a widget. Use the tk.Label class to add some text to a window. Create a Label widget with the text "Hello, Tkinter" and assign it to a variable called greeting:
Code:
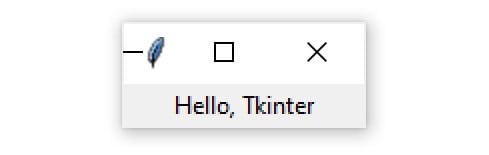
>>> greeting = tk.Label(text="Hello, Tkinter")The window you created earlier doesn’t change. You just created a Label widget, but you haven’t added it to the window yet. There are several ways to add widgets to a window. Right now, you can use the Label widget’s .pack() method:
Code:
>>> greeting.pack()The window now looks like this:
Widget Class Description LabelA widget used to display text on the screen ButtonA button that can contain text and can perform an action when clicked EntryA text entry widget that allows only a single line of text TextA text entry widget that allows multiline text entry FrameA rectangular region used to group related widgets or provide padding between widgets
| Widget Class | Description |
|---|---|
Label | A widget used to display text on the screen |
Button | A button that can contain text and can perform an action when clicked |
Entry | A text entry widget that allows only a single line of text |
Text | A text entry widget that allows multiline text entry |
Frame | A rectangular region used to group related widgets or provide padding between widgets |
You’ll see how to work with each of these in the following sections, but keep in mind that Tkinter has many more widgets than those listed here. The widget’s choice gets even more complicated when you account for a whole new set of themed widgets.
Displaying Text and Images With Label Widgets
Label widgets are used to display text or images. The text displayed by a Label widget can’t be edited by the user. It’s for display purposes only. As you saw in the example at the beginning of this tutorial, you can create a Label widget by instantiating the Label class and passing a string to the text parameter:
Code:
label = tk.Label(text="Hello, Tkinter")Label widgets display text with the default system text color and the default system text background color. These are typically black and white, respectively, but you may see different colors if you’ve changed these settings in your operating system.
You can control Label text and background colors using the foreground and background parameters:
Code:
label = tk.Label(
    text="Hello, Tkinter",
    foreground="white",  # Set the text color to white
    background="black"  # Set the background color to black
)
There are numerous valid color names, including:
"red""orange""yellow""green""blue""purple"
Assigning Widgets to Frames With Frame Widgets
In this tutorial, you’re going to work with only five widgets:
LabelButtonEntryTextFrame
These are the four you’ve seen so far plus the Frame widget. Frame widgets are important for organizing the layout of your widgets in an application.
Before you get into the details about laying out the visual presentation of your widgets, take a closer look at how Frame widgets work, and how you can assign other widgets to them. The following script creates a blank Frame widget and assigns it to the main application window:
Code:
import tkinter as tk

window = tk.Tk()
frame = tk.Frame()
frame.pack()

window.mainloop()
An empty Frame widget is practically invisible. Frames are best thought of as containers for other widgets. You can assign a widget to a frame by setting the widget’s master attribute:
Code:
frame = tk.Frame()
label = tk.Label(master=frame)
To get a feel for how this works, write a script that creates two Frame widgets called frame_a and frame_b. In this script, frame_a contains a label with the text "I'm in Frame A", and frame_b contains the label "I'm in Frame B". Here’s one way to do this:
Code:
import tkinter as tk
window = tk.Tk()
frame_a = tk.Frame()
frame_b = tk.Frame()
label_a = tk.Label(master=frame_a, text="I'm in Frame A")
label_a.pack()
label_b = tk.Label(master=frame_b, text="I'm in Frame B")
label_b.pack()
frame_a.pack()
frame_b.pack()
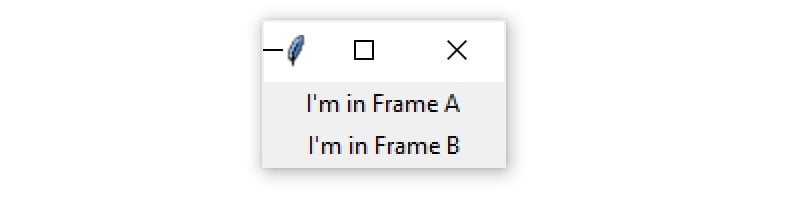
window.mainloop()Note that frame_a is packed into the window before frame_b. The window that opens shows the label in frame_a above the label in frame_b:
Now see what happens when you swap the order of frame_a.pack() and frame_b.pack():
Code:
import tkinter as tk

window = tk.Tk()

frame_a = tk.Frame()
label_a = tk.Label(master=frame_a, text="I'm in Frame A")
label_a.pack()

frame_b = tk.Frame()
label_b = tk.Label(master=frame_b, text="I'm in Frame B")
label_b.pack()

# Swap the order of `frame_a` and `frame_b`
frame_b.pack()
frame_a.pack()

window.mainloop()
The output looks like this:

Now label_b is on top. Since label_b is assigned to frame_b, it moves to wherever frame_b is positioned.
All four of the widget types that you’ve learned about—Label, Button, Entry, and Text—have a master attribute that’s set when you instantiate them. That way, you can control which Frame a widget is assigned to. Frame widgets are great for organizing other widgets in a logical manner. Related widgets can be assigned to the same frame so that, if the frame is ever moved in the window, then the related widgets stay together.
Controlling Layout With Geometry Managers
Up until now, you’ve been adding widgets to windows and Frame widgets using .pack(), but you haven’t learned what exactly this method does. Let’s clear things up! Application layout in Tkinter is controlled with geometry managers. While .pack() is an example of a geometry manager, it isn’t the only one. Tkinter has two others:
.place()
Each window or Frame in your application can use only one geometry manager. However, different frames can use different geometry managers, even if they’re assigned to a frame or window using another geometry manager. Start by taking a closer look at .pack().
The .pack() Geometry Manager
The .pack() geometry manager uses a packing algorithm to place widgets in a Frame or window in a specified order. For a given widget, the packing algorithm has two primary steps:
- Compute a rectangular area called a parcel that’s just tall (or wide) enough to hold the widget and fills the remaining width (or height) in the window with blank space.
- Center the widget in the parcel unless a different location is specified.
.pack() is powerful, but it can be difficult to visualize. The best way to get a feel for .pack() is to look at some examples. See what happens when you .pack() three Label widgets into a Frame:
Code:
import tkinter as tk

window = tk.Tk()

frame1 = tk.Frame(master=window, width=100, height=100, bg="red")
frame1.pack()

frame2 = tk.Frame(master=window, width=50, height=50, bg="yellow")
frame2.pack()

frame3 = tk.Frame(master=window, width=25, height=25, bg="blue")
frame3.pack()

window.mainloop()
.pack() places each Frame below the previous one by default, in the order that they’re assigned to the window:
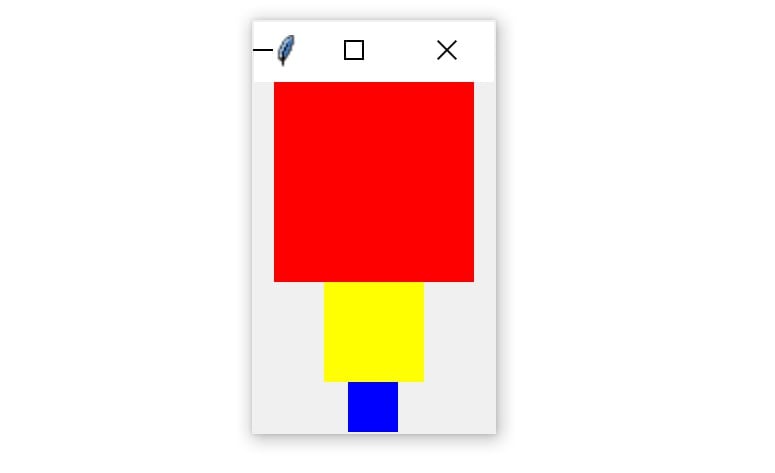
Each Frame is placed at the topmost available position. Therefore, the red Frame is placed at the top of the window. Then the yellow Frame is placed just below the red one and the blue Frame just below the yellow one.
There are three invisible parcels, each containing one of the three Frame widgets. Each parcel is as wide as the window and as tall as the Frame that it contains. Because no anchor point was specified when .pack() was called for each Frame, they’re all centered inside of their parcels. That’s why each Frame is centered in the window.
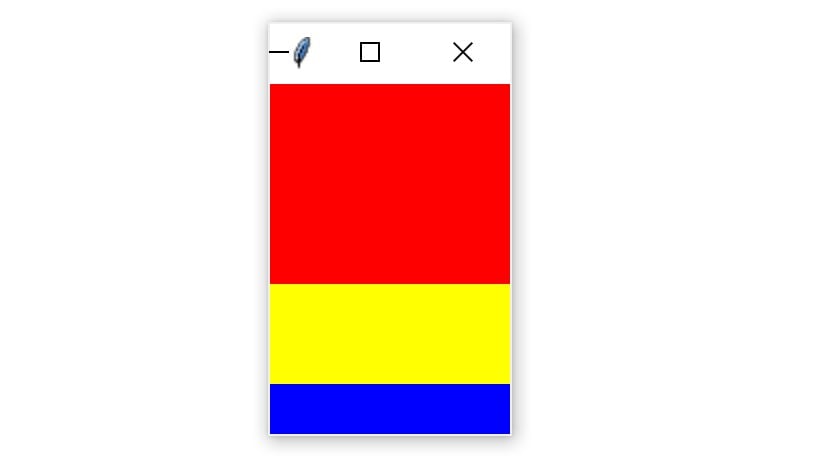
.pack() accepts some keyword arguments for more precisely configuring widget placement. For example, you can set the fill keyword argument to specify in which direction the frames should fill. The options are tk.X to fill in the horizontal direction, tk.Y to fill vertically, and tk.BOTH to fill in both directions. Here’s how you would stack the three frames so that each one fills the whole window horizontally:
Code:
import tkinter as tk

window = tk.Tk()

frame1 = tk.Frame(master=window, height=100, bg="red")
frame1.pack(fill=tk.X)

frame2 = tk.Frame(master=window, height=50, bg="yellow")
frame2.pack(fill=tk.X)

frame3 = tk.Frame(master=window, height=25, bg="blue")
frame3.pack(fill=tk.X)

window.mainloop()
Notice that the width is not set on any of the Frame widgets. width is no longer necessary because each frame sets .pack() to fill horizontally, overriding any width you may set.
The window produced by this script looks like this:
The .place() Geometry Manager
You can use .place() to control the precise location that a widget should occupy in a window or Frame. You must provide two keyword arguments, x and y, which specify the x- and y-coordinates for the top-left corner of the widget. Both x and y are measured in pixels, not text units.
Keep in mind that the origin, where x and y are both 0, is the top-left corner of the Frame or window. So, you can think of the y argument of .place() as the number of pixels from the top of the window, and the x argument as the number of pixels from the left edge of the window.
Here’s an example of how the .place() geometry manager works:
Code:
 1import tkinter as tk
 2
 3window = tk.Tk()
 4
 5frame = tk.Frame(master=window, width=150, height=150)
 6frame.pack()
 7
 8label1 = tk.Label(master=frame, text="I'm at (0, 0)", bg="red")
 9label1.place(x=0, y=0)
10
11label2 = tk.Label(master=frame, text="I'm at (75, 75)", bg="yellow")
12label2.place(x=75, y=75)
13
14window.mainloop()
Making Your Applications Interactive
By now, you have a pretty good idea of how to create a window with Tkinter, add some widgets, and control the application layout. That’s great, but applications shouldn’t just look good—they actually need to do something! In this section, you’ll learn how to bring your applications to life by performing actions whenever certain events occur.
Using command
Every Button widget has a command attribute that you can assign to a function. Whenever the button is pressed, the function is executed.
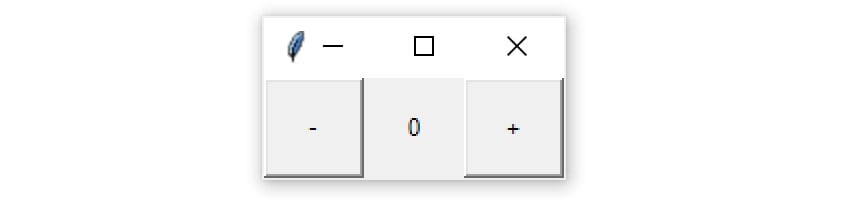
Take a look at an example. First, you’ll create a window with a Label widget that holds a numeric value. You’ll put buttons on the left and right side of the label. The left button will be used to decrease the value in the Label, and the right one will increase the value. Here’s the code for the window:
Code:
 1import tkinter as tk
 2
 3window = tk.Tk()
 4
 5window.rowconfigure(0, minsize=50, weight=1)
 6window.columnconfigure([0, 1, 2], minsize=50, weight=1)
 7
 8btn_decrease = tk.Button(master=window, text="-")
 9btn_decrease.grid(row=0, column=0, sticky="nsew")
10
11lbl_value = tk.Label(master=window, text="0")
12lbl_value.grid(row=0, column=1)
13
14btn_increase = tk.Button(master=window, text="+")
15btn_increase.grid(row=0, column=2, sticky="nsew")
16
17window.mainloop()
The window looks like this:
With the app layout defined, you can bring it to life by giving the buttons some commands. Start with the left button. When this button is pressed, it should decrease the value in the label by one. In order to do this, you first need to get answers to two questions:
- How do you get the text in
Label? - How do you update the text in
Label?
Label widgets don’t have .get() like Entry and Text widgets do. However, you can retrieve the text from the label by accessing the text attribute with a dictionary-style subscript notation:
Code:
label = tk.Label(text="Hello")

# Retrieve a label's text
text = label["text"]

# Set new text for the label
label["text"] = "Good bye"
Now that you know how to get and set a label’s text, write an increase() function that increases the value in lbl_value by one:
Code:
 1import tkinter as tk
 2
 3def increase():
 4    value = int(lbl_value["text"])
 5    lbl_value["text"] = f"{value + 1}"
 6
 7# ...
increase() gets the text from lbl_value and converts it to an integer with int(). Then, it increases this value by one and sets the label’s text attribute to this new value.
You’ll also need decrease() to decrease the value in value_label by one:
Code:
 5# ...
 6
 7def decrease():
 8    value = int(lbl_value["text"])
 9    lbl_value["text"] = f"{value - 1}"
10
11# ...
This app isn’t particularly useful, but the skills you learned here apply to every app you’ll make:
- Use widgets to create the components of the user interface.
- Use geometry managers to control the layout of the application.
- Write event handlers that interact with various components to capture and transform user input.
Conclusion
In this tutorial, you learned how to get started with Python GUI programming. Tkinter is a compelling choice for a Python GUI framework because it’s built into the Python standard library, and it’s relatively painless to make applications with this framework.
Throughout this tutorial, you’ve learned several important Tkinter concepts:
- How to work with widgets
- How to control your application layout with geometry managers
- How to make your applications interactive
- How to use five basic Tkinter widgets:
Label,Button,Entry,Text, andFrame
Now that you’ve mastered the foundations of Python GUI programming with Tkinter, the next step is to build some of your own applications. :)
By- 20cs037
20cs039
20cs042
Comments
Post a Comment